

“Intention or purpose” is the general definition of intent. Consequently, to put it simply, design intent refers to the goal that a design will achieve. When it is exhibited, what message will it send, and how will it be incorporated into the product?
From an engineering standpoint, it is about how, as a CAD designer, you will effectively and virtually construct a product using the set of CAD tools. When you search the internet, you’ll find a lot of explanations regarding design intent, including
“It is a method used in computer-aided design that defines relationships between objects so that a change to one propagates automatically to others,” according to a blog post by Dave Martin from PTC.
Source: https://www.ptc.com/en/blogs/cad/design-intent-explained
“It is how your model behaves when dimensions are modified,” claims Dassault Systems.
Source: https://help.solidworks.com/2021/English/SolidWorks/acadhelp/c_Design_Intent.htm
It has a plethora of further definitions.
In my opinion, “it is the concept that helps a CAD user comprehend the relationships between objects and construct models so that, in the event of a modification, the model retains its intended purpose and function throughout the design process.” Nemo Joseph
It facilitates learning how to include parametric relations between features and comprehends the link between features.
It aids in the development of the modelling strategy by providing knowledge of the product’s fit, form, and function.
Table of Contents
How to implement it?
It is not like a formula that you may use to achieve the outcome instantly as a novice or student. However, for one to arrive to a solution or formula, a derivation must be made. To put it simply, the process has to be established in order to determine what the best possible result is. One could learn what design intent or technique should be used in creating the virtual prototype by using a trial-and-error methodology.
Based on certain Engineering principles one could start to understand how to build the virtual prototype, like
- Design Thinking
- F3 OR FFF
Design Thinking:
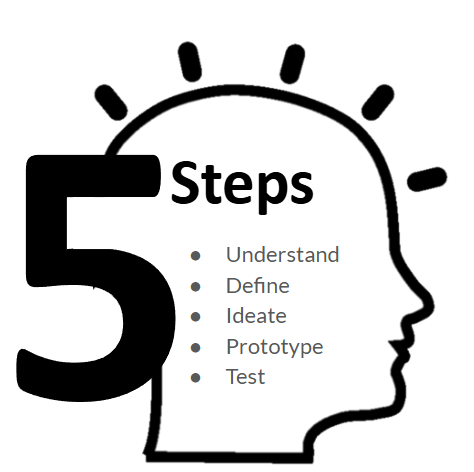
Design Thinking includes Design Intent as a subset. However, in order to carry out it, a designer must comprehend Design Thinking. The Design Thinking technique follows a five-step procedure.
“Design thinking is a human-centred approach to innovation that draws from the designer’s toolkit to integrate the needs of people, the possibilities of technology, and the requirements for business success.”
– Tim Brown, CEO IDEO
F3 OR FFF
Form, fit, and function are abbreviated as F3 or FFF. It is to understand the product’s size, form, and functionality.
In other words, it’s important to have a comprehensive understanding of the product’s shape and functionality while creating a virtual prototype. The size comes in second, determining how well it will fit in the available space. Performance comes in third, determining whether it satisfies requirements and operates as intended in the intended environment.
To properly execute their design objective, designers must have a thorough understanding of the production process.
Where to Implement?
Taking into account the designer’s perspective, it can be implemented while creating the design in the following ways:
- Sketch
- Part
- Assembly
Design Intent – Example
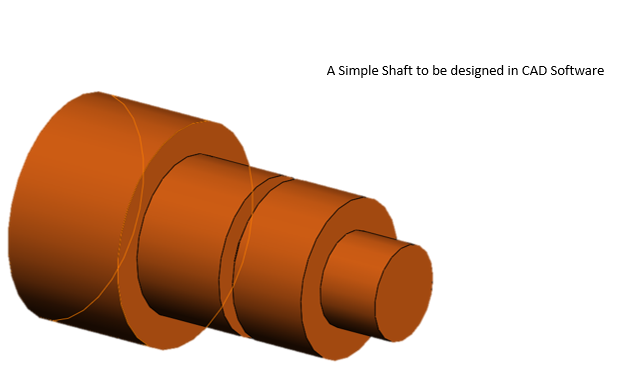
In this example of creating a shaft, we will see different approaches to how it is modelled. In the illustrations below, there are three approaches explained.
Let’s see how to build it.
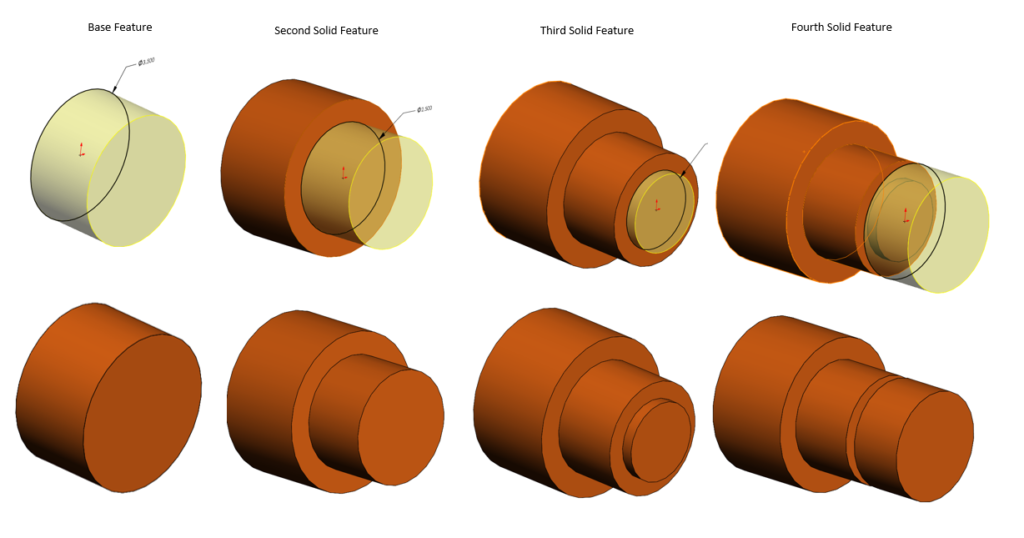
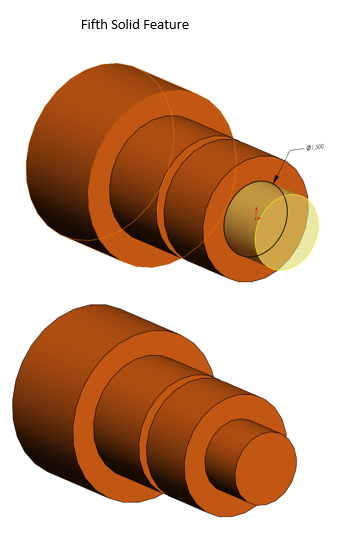
Design Intent: 1 Manufacturing Process
In this approach, the shaft is built using the manufacturing process, where a blank shaft is built, and then other features are created and subtracted.

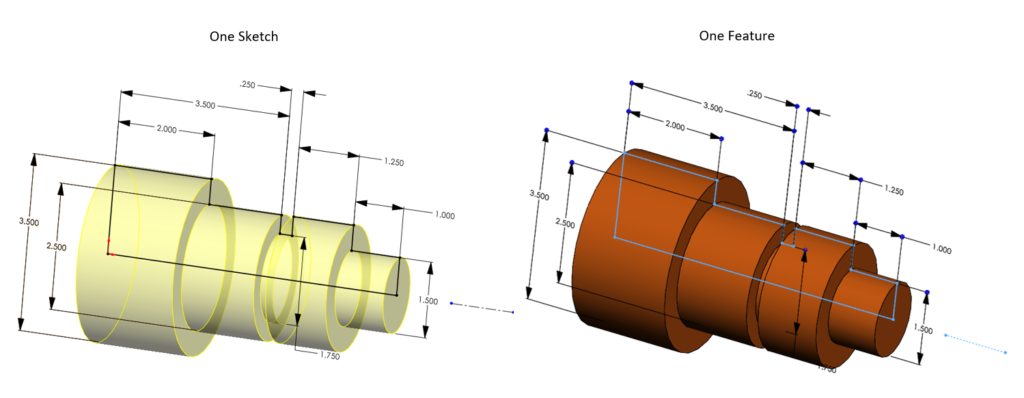
Design Intent: 2 Potter’s Wheel
In this approach, there is one sketch containing all the details that is revolved along its centre axis to build the shaft in one go.
Design Intent: 3 Layer Cake Approach
In this approach, each section of the shaft is considered a feature and is built one upon the other in a step-by-step manner.
In a Nutshell
It is important to use the right strategies while building the virtual prototype because when changes are made in the future, it should adapt to the changes without affecting the downstream features, reducing the rework time and feature failure. Yes, to attain the class, one has to practice it and discuss it with the senior resource person, asking for mentorship.
Experience is the best teacher.
As it is said, “Learning is a continuous and never-ending process.”